Once you have created the stages of a business process, configure the transitions. These are the rules that define:
- the moment when the document proceeds to the next stage;
- the status of the document after the transition.
Create a transition
- Open the «Operations» tab in the «Settings/Operations» section. Click
 to create a new operation, or open an existing one to edit it.
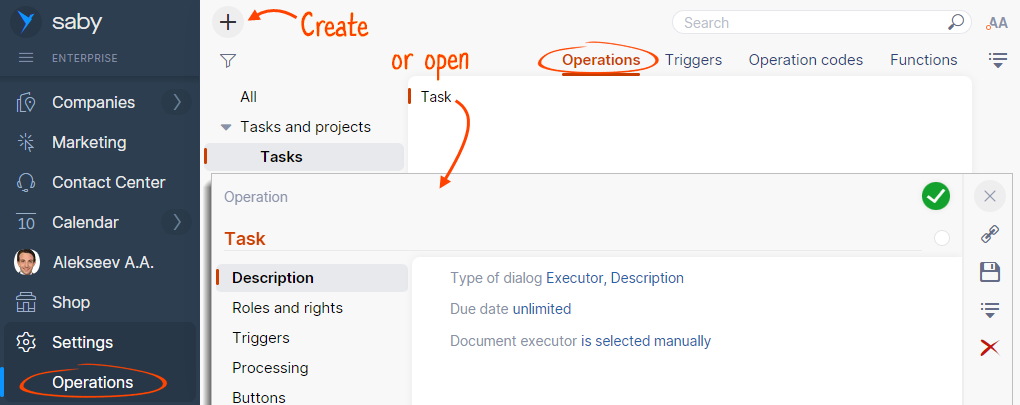
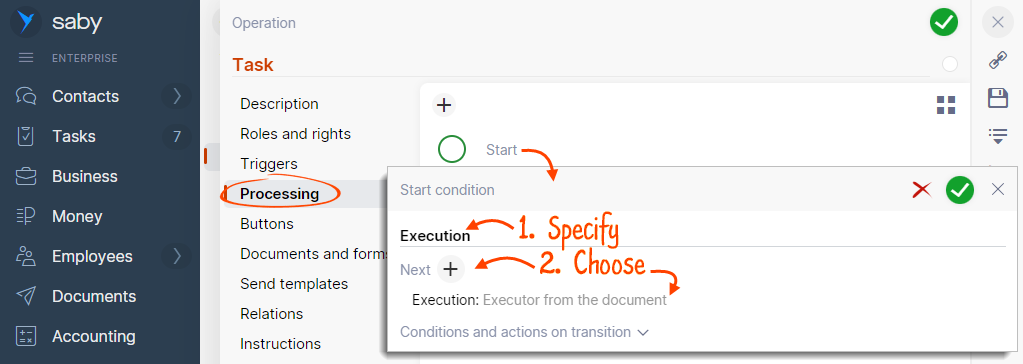
- Go to the «Processing» section. You can add stages in the list mode or use the flowchart editor.

- Add a start transition to move the created document to the next stages. Click «Start», specify name, and select the following stage. Click
 .
. 
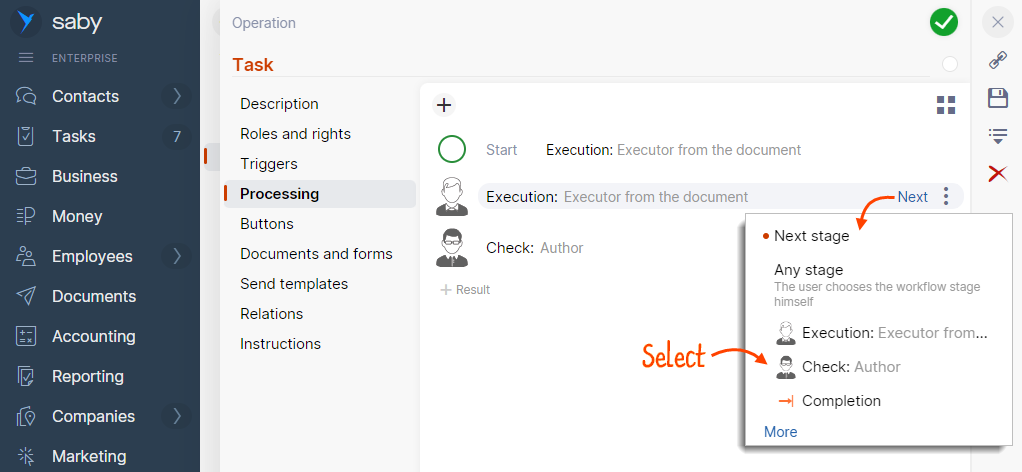
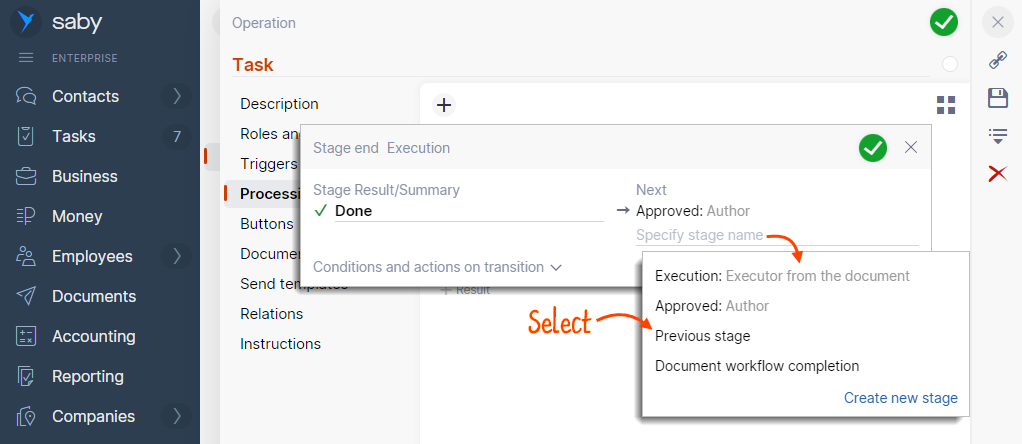
- Create transitions between stages. Click «Next» and select the stage to move the document to.
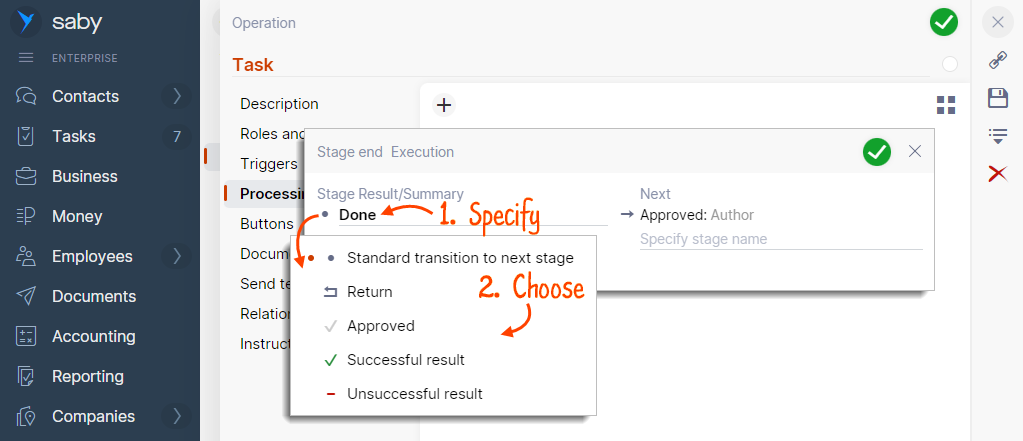
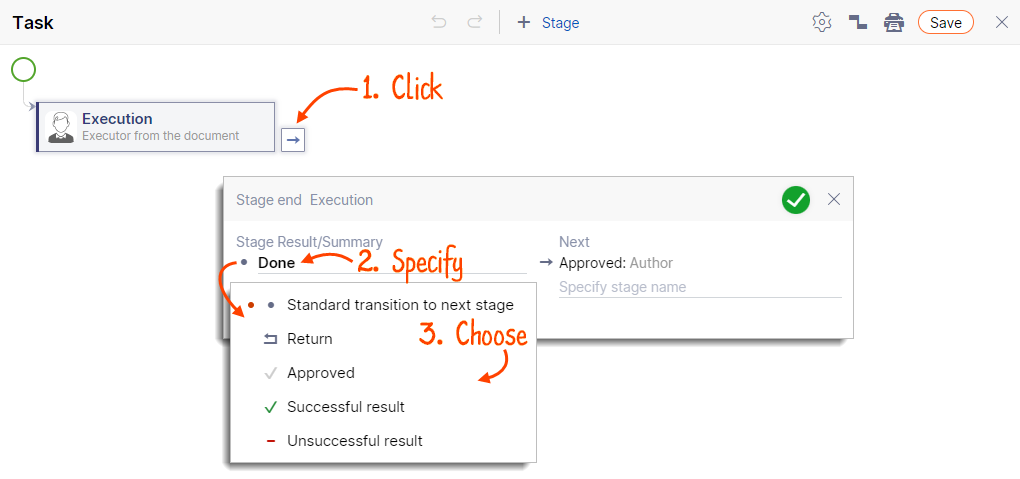
- Specify the transition name, for example, «Approved», «Need more info». Select its type:
- «
 Successful result» and «
 Unsuccessful result» are significant transitions that change the document status. They are marked as or in the workflow;
 - «
 Standard transition to next stage» and «
 Approved» do not change the document status, but when the result is «Approved», the mark appears in the workflow;
 - «
 Return» cancels the previous transition, and the mark appears in the workflow. For instance, if the data in the document is not sufficient, the checker returns it to the executor for improvement.
- «
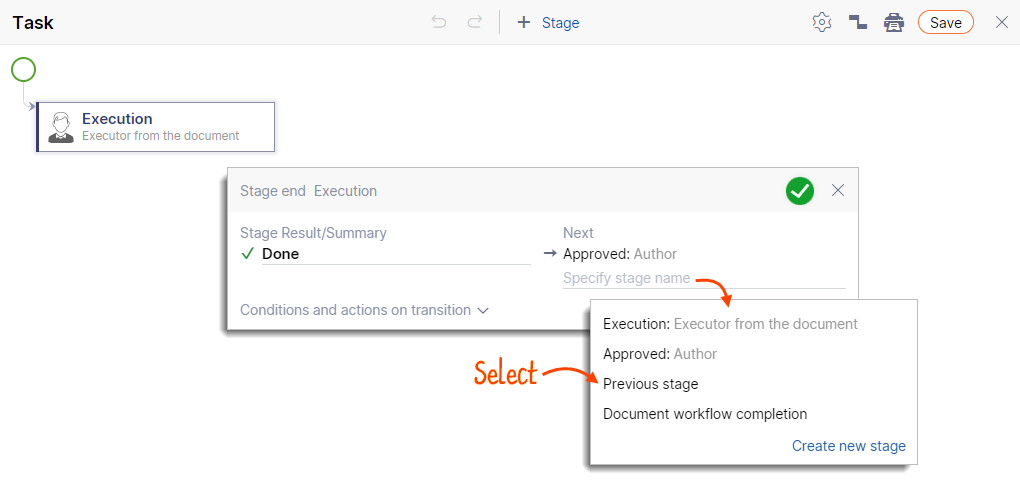
- Specify one or several stages to which the transition will lead. If you need to complete the workflow, select «Document workflow completion».
To configure the ability of the transition to the previous stage, select the «Previous stage» option.
For example, three people — the secretary, the head of the department, and the director — check the task in a sequence. If the director returns the task for improvement, the executor will update it and send for approval to the director only. The secretary and department head won't have to check it again.
- Click .


Configure a transition
Click on the transition to configure it.

- Select
 , and then click on the flowchart.
- Add a start transition to move the created document to the next stages. Click
 , specify name, and select the following stage. Click .
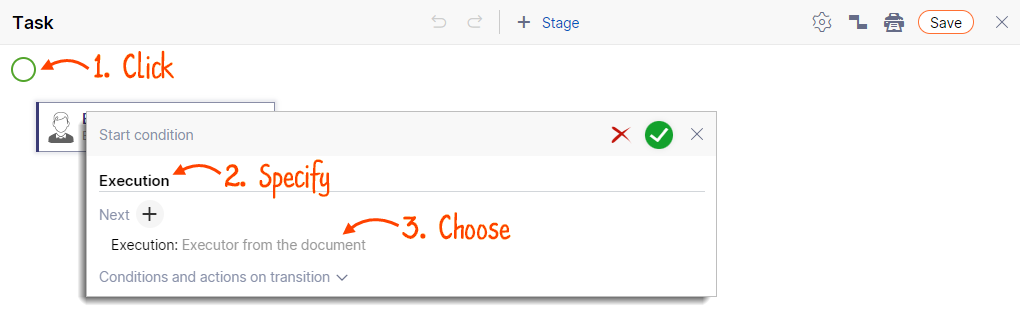
- Create transitions between other stages: point the cursor to the stage and click
 .
. - Specify the transition name, for example, «Approved», «Need more info». Select its type:
- « Successful result» and « Unsuccessful result» are significant transitions that change the document status. They are marked as or in the workflow;
- « Standard transition to next stage» and « Approved» do not change the document status, but when the result is «Approved», the mark appears in the workflow;
- « Return» cancels the previous transition, and the mark appears in the workflow. For instance, if the data in the document is not sufficient, the checker returns it to the executor for improvement.
- «
- Specify one or several stages to which the transition will lead. If you need to complete the workflow, select «Document workflow completion».
To configure the ability of the transition to the previous stage, select the «Previous stage» option.
For example, three people — the secretary, the head of the department, and the director — check the task in a sequence. If the director returns the task for improvement, the executor will update it and send for approval to the director only. The secretary and department head won't have to check it again.
- Click .


Configure a transition
Click on the transition to configure it.

Configure a transition using the application code
Configure the conditions for availability of transitions in the document. If the specified formula returns:
- «true», the transition will be available when closing the stage;
- any other value, for example, «false», «none» or «undefined», the transition will be hidden.
The most popular examples are shown below.
Add an operation result
The result is a transition that completes the document workflow and is displayed at any stage of the business process. You can add several positive and negative results.
- In the «Processing» section, click «+ Result».
- Select the result type: positive or
 negative.
 - Specify the name and click .

Operation without configuring transitions
When you are configuring a simple business process, for example, a material request, you don't have to configure transitions.
Create a stage, point the cursor to it, click «Next», and select one of the options:
- next stage — the executor will complete the stage and the document will be moved to the next stage in the list;
- any stage — all workflow stages will be available for selection. The task or document will go to the selected stage, bypassing the other ones.
